The secret to maintaining pest-free houseplants begins long before you place them on your windowsill; it starts with careful selection and preparation at the nursery. Bringing home a new houseplant should be a joyous occasion, but many indoor gardeners experience that sinking feeling when they notice subtle signs of infestation, such as tiny moving dots, fine webbing between leaves and stems, or leaves that appear discoloured or unhealthy.
You might have hoped this moment would never arrive, but pests can quickly establish themselves in your home environment. However, with proactive measures, these issues can often be prevented entirely, saving you time and effort in the long run.
Inspect Plants Thoroughly Before Purchase
The old adage about an ounce of prevention being worth a pound of cure holds particularly true for houseplant infestations. To avoid introducing pests into your home, take precautions starting at the nursery or garden centre. Before making a purchase, inspect the plant closely, examining the soil, stems, leaves, and especially the undersides of leaves where many pests like to hide.

Use your smartphone camera to zoom in on any questionable specks or irregularities. If the plant appears healthy and free of visible pests, you can proceed with the purchase. However, it is crucial to repot the plant once it crosses your threshold to further minimise risks.
Steps to Take When Bringing the Plant Home
Upon arriving home, remove the plant from its original container and gently shake it to dislodge loose soil. Wipe away as much soil from the roots as possible, as even in the absence of visible pests, there could be eggs waiting to hatch in the potting mix.
Repot the plant using fresh, sterile potting mix in a clean container that features a drainage hole at the bottom. If you choose to reuse the original pot, wash it thoroughly and disinfect it with a solution of nine parts water to one part bleach to eliminate any lingering pathogens or pests.
Plant the roots at the same depth as they were in the original pot, and tamp the soil down firmly to remove air pockets. After repotting, give the plant a moderate drink of water to help it settle into its new environment.
Applying Diatomaceous Earth for Protection
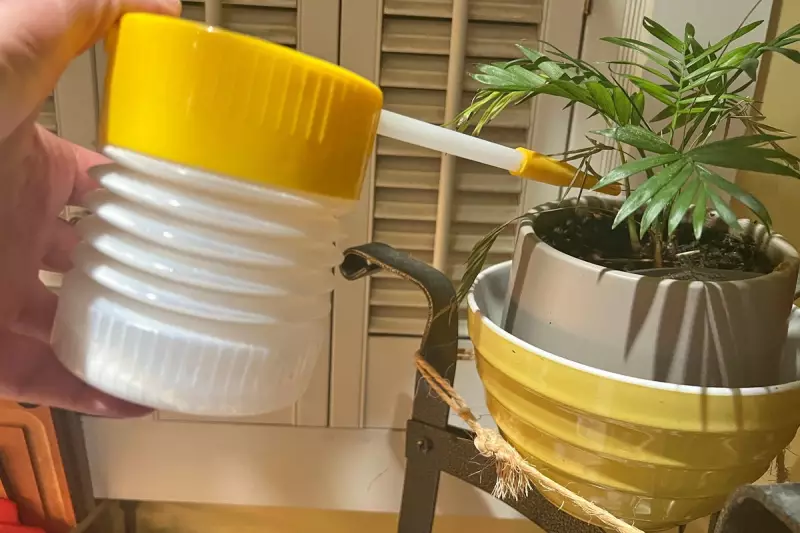
Once the soil surface has dried, sprinkle it with about a quarter-inch of food-grade diatomaceous earth (DE). For even distribution, consider using a powder duster, also known as a puffer. It is advisable to wear a mask during application, as while DE is non-toxic to humans and pets, the dust can irritate your lungs if inhaled.
Diatomaceous earth works by dehydrating insects that crawl across its tiny, shard-like particles, leading to their demise. To maintain its effectiveness, DE must be kept dry, so adopt a bottom-watering method by placing pots in a shallow container of water for about fifteen minutes, allowing the soil and roots to absorb moisture before discarding any excess water.
This bottom-watering technique also helps prevent fungal diseases and root rot, making it a beneficial practice regardless of pest concerns. Reapply DE occasionally, as soil moisture can degrade it over time, even with careful watering from below.
Quarantine New Plants to Protect Others
If you already have other houseplants, quarantine the newcomer in a separate room for three to four weeks. During this period, inspect it every few days as you did at the nursery, as some pests may not become apparent immediately. Only when you are confident that the plant is pest-free should you introduce it to the rest of your plant collection, ensuring a healthy and harmonious indoor garden.
Jessica Damiano writes weekly gardening columns for the Associated Press and publishes the award-winning Weekly Dirt Newsletter. For more expert gardening tips and advice, you can sign up for her newsletter online.
For additional gardening stories and resources, visit the Associated Press gardening hub, where you will find a wealth of information on plant care and cultivation techniques.