Scarification: The Simple Seed-Starting Trick That Helps Tough-Coated Seeds Sprout Faster
Many gardeners are currently dusting off their seed-starting supplies and sorting through seed packets from previous years. Seed starting is an annual ritual for numerous enthusiasts, but if you are new to this practice, it is essential to understand that not all seeds should be treated identically.
Numerous seeds only require soil and water to sprout successfully. However, others possess a harder coating that makes germination more challenging. This characteristic stems from their natural survival strategy in the wild, where they rely on birds and other wildlife to consume and transport them over distances before deposition.
Nature's Survival Plan and Its Challenges
This strategy is effective for promoting biodiversity by introducing plant species to new locations. The seed's tough outer coating ensures its survival through an animal's digestive tract, which erodes just enough of the protective layer to allow water penetration. The remaining coating prevents premature germination, which could be fatal for tender sprouts in cold temperatures.

Nevertheless, nature's survival plan presents a challenge for home gardeners, as the hard coating inhibits easy sprouting. Consequently, it falls to us to mimic the effects of stomach acid to expose the seed's inner layer, enabling moisture absorption.
What Is Scarification and How to Do It
This process is known as scarification, and there are several straightforward methods to achieve it. All techniques are simple and can be performed with common household items.
Sanding: Gently rub each seed against medium-grit sandpaper, an emery board, or a nail file until a hint of the paler inner layer becomes visible. This method works best with larger seeds, but you can also place several small seeds between two sheets of sandpaper and rub them together lightly. Minimal friction is typically sufficient.
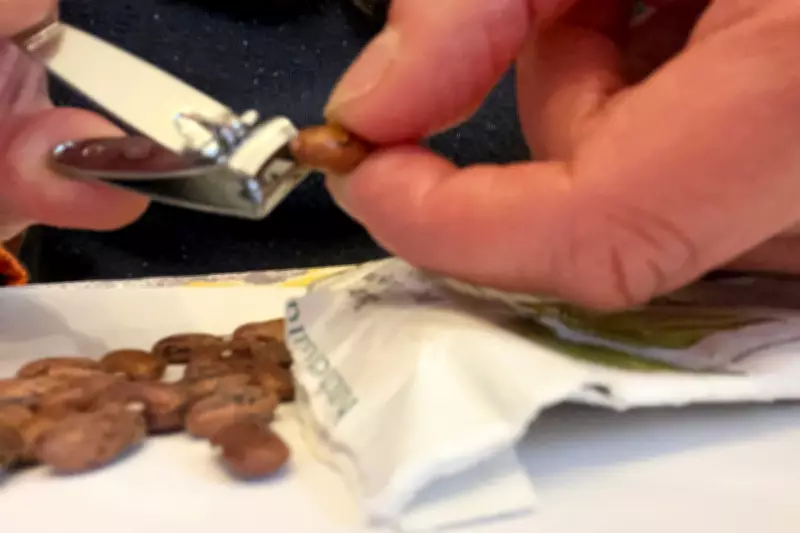
Nicking: Use small nail clippers, such as those designed for babies, to snip a tiny sliver off the edge of the seed's coat. This precise approach can be particularly effective for delicate seeds.
Soaking: If you have more time than tools, this is the easiest method. Place the seeds in a bowl, cover them with warm water, and let them sit for a few hours or overnight. They will swell slightly as they absorb moisture, which is the desired outcome.
Essential Tips for Successful Scarification
Always avoid using hot water, as cooked seeds will not grow. Keep the temperature below 150 degrees Fahrenheit (66 degrees Celsius). Additionally, whatever method you choose, perform it immediately before planting. Once the seed's inner tissue is exposed, it will begin to dry out, potentially reducing viability.
Is Scarification Absolutely Required?
No, scarification is not strictly necessary. Seeds will often sprout without it, but the process may take much longer, and you are likely to end up with far fewer seedlings. Scarified seeds do not have to wait for their coats to break down naturally in the soil, which is a significant advantage if your growing season is short, you live at a high elevation, or you tend to procrastinate.
Plants That Benefit from Scarification
Several common annuals and perennials benefit from scarification, including Indian mallow (Abutilon), columbine (Aquilegia), hollyhock (Alcea), sweet alyssum (Alyssum), milkweed (Asclepias), wild indigo (Baptisia), beautyberry (Callicarpa), bellflower (Campanula), Joe Pye weed (Eutrochium), sweet pea (Lathyrus odoratus), bluebonnet (Lupine), mallow (Malva), poppy (Papaver), beardtongue (Penstemon), and nasturtium (Tropaeolum).
Edible plants to scarify encompass all bean types, luffa, spinach, strawberry, and winter squash. Some particularly stubborn seeds, such as chickpeas, lima beans, and nasturtiums, respond well to a combined approach: a little nick or sanding followed by a soak.
Jessica Damiano writes weekly gardening columns for the AP and publishes the award-winning Weekly Dirt Newsletter. For more gardening stories, visit the AP gardening hub.