Why Proper Dehumidifier Cleaning Is Essential for UK Homes
In the UK, where long and wet winters are increasingly common, dehumidifiers have become a vital appliance in many households. They help reduce condensation on windows, dry laundry during colder months, and control damp, mould-prone areas. However, these benefits only materialise if the appliance is well-maintained. This expert guide provides comprehensive steps to clean your dehumidifier, ensuring it operates at peak condition.
It's easy to overlook that while extracting moisture from the air, your dehumidifier also draws in dust, fibres, pet hair, and other airborne particles. Combined with water and warmth, this can lead to a murky residue accumulating in the tank and on the filter, hindering performance.
Expert Insights on Dehumidifier Maintenance
Glenn Gault, CEO of Gault Heating & Cooling, emphasises the importance of regular cleaning. "A dirty dehumidifier will not work as well as a clean one because airflow gets restricted within the unit," says Glenn. "Sticking to a regular cleaning schedule will improve performance and extend its lifespan."

Initially, performance drops may be subtle: laundry takes longer to dry, rooms feel less crisp, or a faint musty odour emerges from the tank. These inefficiencies can escalate, especially when many rely on dehumidifiers to cut energy bills instead of using tumble dryers. Restricted airflow forces the unit to run longer, quietly increasing energy costs.
How Often Should You Clean Your Dehumidifier?
There isn't a one-size-fits-all schedule; frequency depends on usage. For daily use in condensation-prone flats or with laundry racks, dust and moisture build up faster than with occasional use during damp spells.
Eli Zimmer, CEO of Luxaire HVAC Services in the US, recommends a routine: "Regular cleaning should be done at least once a month, and often twice monthly during periods of high humidity. Emptying the water reservoir daily is smart, and filters should be replaced or cleaned every couple of weeks."
Tanks can develop a slippery residue from settled dust and debris, even when not visibly dirty. Proactive cleaning prevents stubborn buildup.
Precautions Before Cleaning Your Dehumidifier
Cleaning isn't complicated, but as an electrical appliance, it requires care. Chris Michael, founder and managing director of Meaco, advises: "Switch it off at the wall and unplug it before cleaning." Water and electricity are a dangerous mix.
Use warm water and mild detergent; harsh sprays or bleach can degrade plastics and seals over time. Avoid spraying cleaner directly into vents—apply it to a microfibre cloth instead. Always consult your manual for specific cleaning advice, especially regarding filters. Some filters aren't washable, and if rinsing is allowed, ensure they dry completely before refitting—overnight drying is safest.

What You'll Need for Cleaning
- Microfibre cloths
- Mild washing-up liquid or cleaning spray
- Vacuum cleaner with a brush attachment
- White vinegar (optional, for limescale or odours)
Step-by-Step Cleaning Process
- Power Down: Switch off and unplug the unit. Remove and empty the water tank.
- Clean the Water Tank: Glenn notes that tanks can develop slimy film and bacteria. Scrub the inside, focusing on seams and corners. Rinse thoroughly and dry. For limescale or odours, soak in diluted white vinegar for 30 minutes before rinsing.
- Remove and Clean the Filter: Vacuum both sides of the filter. If washable and still clogged, rinse under lukewarm water, shake off excess, and dry upright for 24 hours. Chris advises checking filters every two weeks, noting HEPA filters aren't washable and require replacement per the manual.
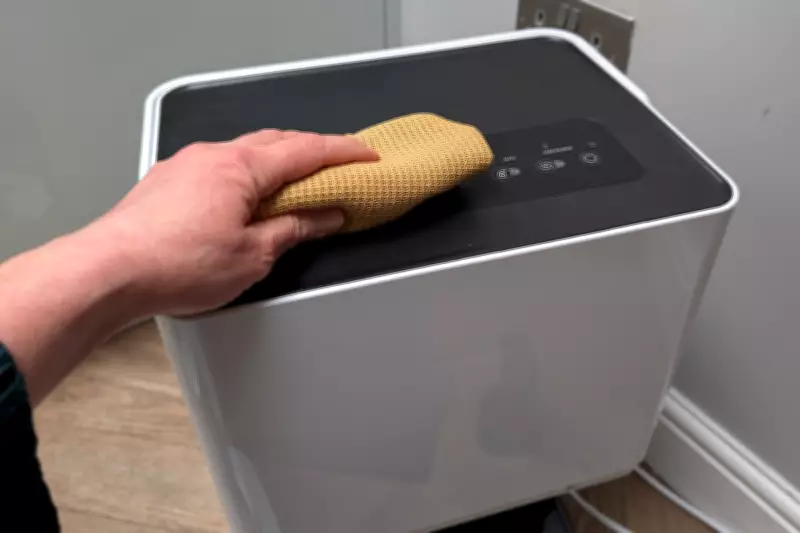
- Clean Vents and Air Intake: Use a vacuum with a brush attachment on grilles and wipe the outer casing with a damp cloth.
- Clean the Coils (Once or Twice a Year): Expose the internal metal fins by removing the filter. Vacuum gently along the fins without using water or bending them, which can affect airflow.
- Check the Drain Hose (If Applicable): For continuous use with a hose, detach and flush with warm water or a mild vinegar solution to remove slime from stagnant water. Ensure it's clear before reattaching.
- Reassemble Once Dry: Refit the fully dry filter, slide the tank back, and plug in the unit. Run it briefly to check airflow and functionality. Persistent musty smells may require revisiting the tank or hose.
Common Mistakes to Avoid
Most issues arise from overzealous cleaning. Avoid spraying cleaner directly into vents or using stiff brushes on delicate fins, as moisture and electricity don't mix, and fins bend easily. Skip bleach or aggressive chemicals; warm, soapy water is effective and gentler on plastics and seals.
Another error is refitting filters that feel dry but aren't fully dry, trapping moisture inside. Allow proper drying time. Glenn warns against amateur engineering: "Homeowners shouldn't attempt to clean inside sealed refrigerant parts. They're sealed for a reason." Stick to routine upkeep for safety and efficiency.